William Crawford, a culinary teacher at Show Low High School, is inspiring students and building a bridge between academics and real-world skills through his innovative program. Thanks to the Arizona Beef Council’s Beef Up the Classroom grant program, Chef Smokin’ Bill has been able to transform his classroom into a hub of learning and practical application, fostering student growth and community engagement.
The Beef Up the Classroom grant program, funded by the Arizona Cattle Industry Research and Education Foundation, aims to support educators in implementing agriculture-focused curricula that emphasize the importance of the beef community, sustainability, and nutrition. This program provides funding and resources so teachers can keep and use beef in their curriculum, teaching students how to choose, prepare, and cook beef. Show Low High School is one of many beneficiaries of this impactful program.
Crawford’s program goes beyond traditional culinary instruction. He integrates hands-on activities and real-world applications that resonate with students. Through the grant, he was able to enhance his classroom resources, purchasing essential tools and supplies to expand his culinary program. “The grant allowed us to acquire equipment for butchering demonstrations and hands-on lessons that teach students about the journey of beef from pasture to plate,” Crawford explains.
One notable aspect of his program is the focus on teaching students how to cut and prepare beef. By incorporating butchering demonstrations, Crawford not only imparts technical skills but also encourages a deeper understanding of the beef community. These lessons align with his broader goal of preparing students for future careers in culinary arts, agriculture, and food sciences.
Students at Show Low High School have embraced these opportunities enthusiastically. For many, this is their first exposure to the practical aspects of food preparation and agriculture. “It’s amazing to learn where our food comes from and how much work goes into getting it to our tables,” shared one student. Another added, “I’m considering a career in culinary arts now because of this class. It’s really opened my eyes to all the possibilities.”
Beyond the classroom, Crawford’s program fosters connections with the local community. By inviting local ranchers and industry professionals to speak with students, he bridges the gap between education and the agricultural industry. These interactions give students a firsthand look at the challenges and rewards of ranching and beef production, inspiring a new generation of agricultural and culinary leaders.
The Arizona Beef Council’s support has been instrumental in making these experiences possible. Through the Beef Up the Classroom grant program, the ABC aims to promote agricultural literacy and highlight the vital role of the beef community. By investing in programs like Crawford’s, the ABC helps ensure that students not only learn about agriculture but also develop a lasting appreciation for it.
For Crawford, the impact of the grant goes beyond financial support. “It’s about showing students that culinary arts is not just a subject to study; it’s a way of life and a cornerstone of our community,” he says. His passion for teaching and commitment to his students are evident in the success of his program and the enthusiasm it generates.
As the program continues to thrive, Crawford hopes to expand its reach and impact. He envisions collaborations with other schools and community organizations to further enrich the learning experience. His ultimate goal is to inspire students to see agriculture and culinary arts not only as career paths but also as vital parts of society.
The Beef Up the Classroom program is generously funded by the Arizona Cattle Research Industry and Education Foundation. For more information about the program and to apply for funds next, check out the webpage HERE.
Andie Ovard, an intuitive eating dietitian, wrote this blog post about including beef in a healthy diet. Andie has been a registered dietitian nutritionist for 11 years. After working for 8 years at the University of Utah hospital as a clinical dietitian in the cardiac ICU she moved to AZ with her husband and started her own business virtually coaching women to learn how to stop dieting and heal their relationships with food through sustainable healthy habits. She loves being a dietitian and in her free time loves to ride her horses, hunt, camp and go to team roping jackpots with her husband. Give her a follow on Instagram by clicking HERE.
Well, it is now…but it wasn’t, for too many years of my life.
I used to think beef was unhealthy. I felt like it was too high in fat and calories so I avoided it, and, unfortunately, I missed out on a lot of the benefits of beef because of it.
As a registered dietitian, I have a passion for helping people understand how to eat and maintain a healthy diet and lifestyle, and eating beef can and should be a part of a healthy diet. Let’s talk about why.
When we think of the benefits of beef, we usually only think about protein. While yes, beef is high in protein, there are so many other benefits to eating beef. Not only is beef packed with protein but it is an excellent source of iron, zinc, and B vitamins, all of which are so important for our health.
Let’s dive into a few of the benefits of beef and its nutrients. First up, iron. Iron is essential for helping your body get enough oxygen and maintaining your energy levels. When you don’t get enough iron, you risk becoming anemic which causes fatigue, headaches, and more. As someone who used to struggle with anemia, I’ve noticed a big difference in my energy levels since I’ve started including beef regularly in my diet.
There are also significant amounts of zinc and B vitamins in beef. Zinc is important for supporting your immune system, wound healing as well as improving your metabolism, while B vitamins have endless benefits like working as antioxidants (B2), maintaining heart health and metabolism (B3) and even improving mood and brain health (B6).
How many other foods can you think of that have so many benefits? I don’t like using the word “superfood” but if I did, beef would be one of them.
The other great thing about beef is how versatile it is. From ground beef for spaghetti and burgers to steak, to ribs to brisket for salads and tacos, you really can’t ever get sick of it.
So what’s one thing you can do to improve your health in 2024? Start including beef in your diet regularly! Beef…it SHOULD be what’s for dinner.
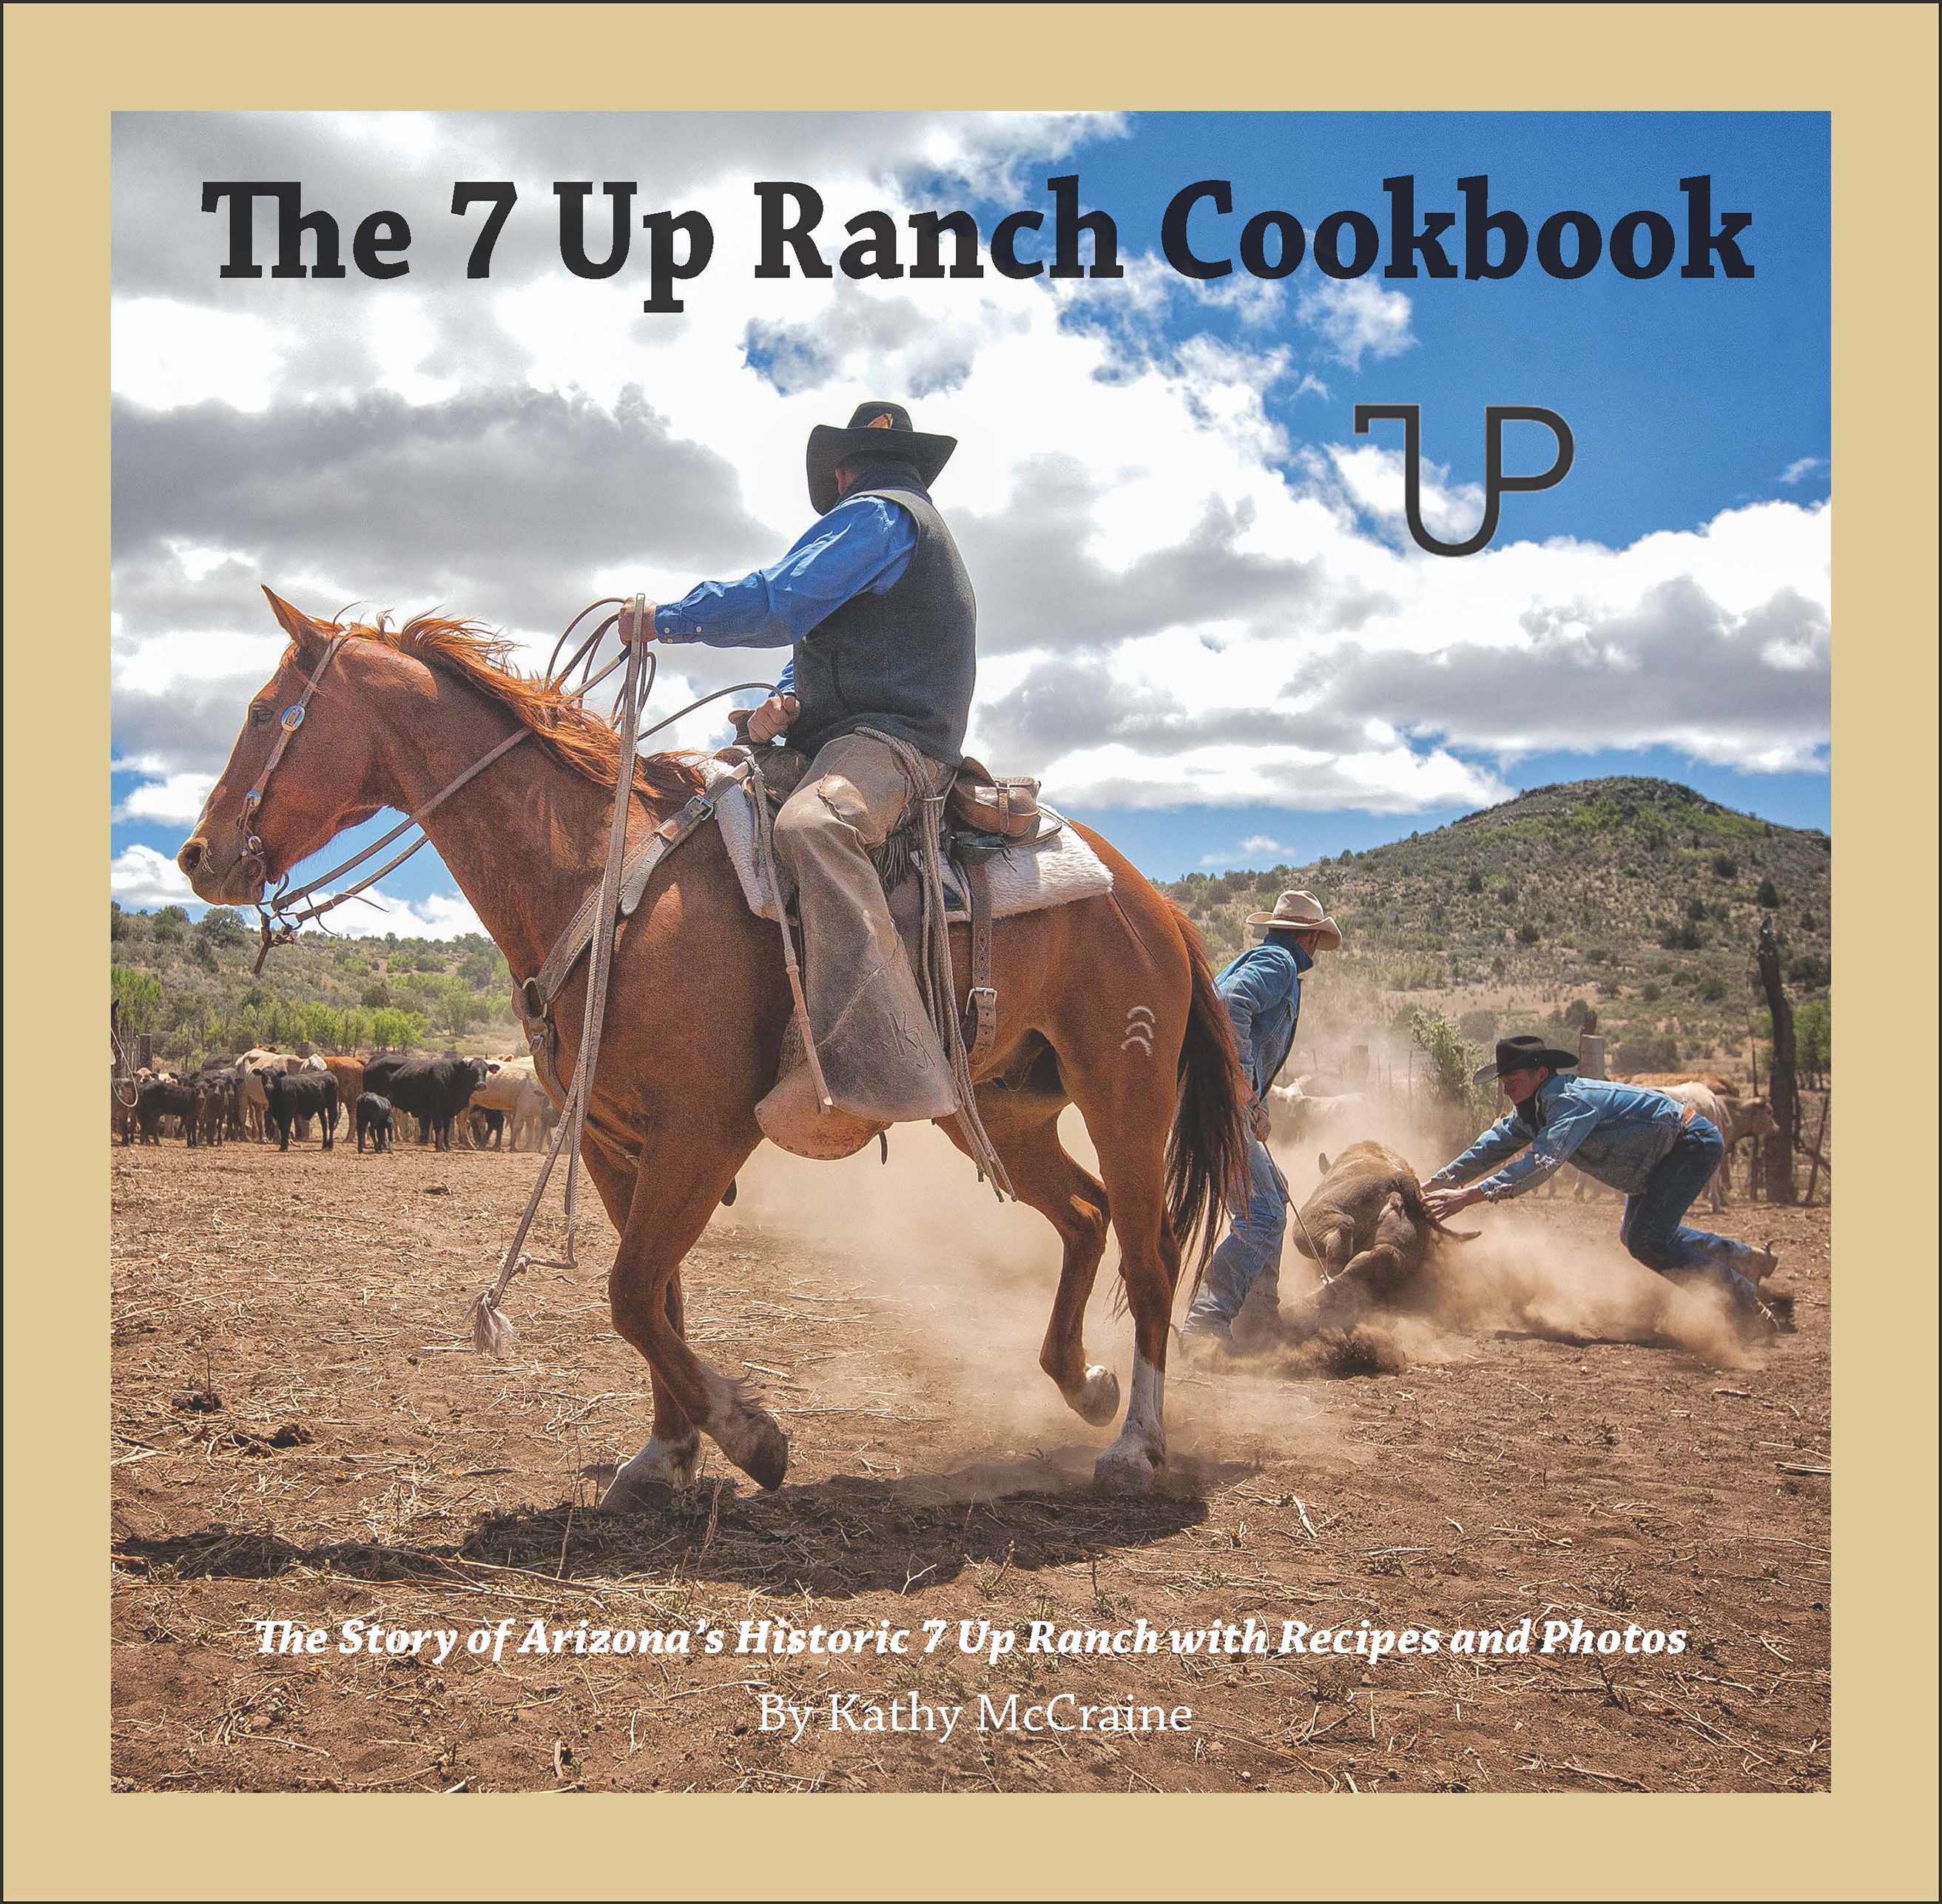
What was intentionally meant to showcase and record the recipes used, prepared, and cherished from many years of working cattle and feeding hungry cowboys, this beautiful book blossomed into a much larger and more comprehensive story and history of the 7Up Ranch located outside Prescott, Arizona. Author Kathy McCraine, the visionary behind the book, and owner of the 7Up, grew up on a ranch in Arizona and has been involved with ranching, writing about it, and photographing it all her life. After graduating from the University of Arizona with a degree in journalism, she wrote for and edited several livestock and horse publications, then founded one of the first advertising agencies in the country to specialize in livestock.
Kathy met her husband, Swayze McCraine, in San Antonio, Texas, where she was editor of the International Brangus Journal, and he was managing a large Brangus operation. After their marriage in 1976, they ranched in Mississippi, Florida, and ultimately Arizona, where they operated several ranches before buying the 7Up Ranch. Kathy also competed in barrel racing and cutting. She was instrumental in putting together the original foundation mares in the Campwood horse program.
Kathy has published several books, and her freelance articles have appeared in such magazines as Western Horseman, Arizona Highways, Range, Cowboys & Indians, and Ranch & Reata. Her photographs have been exhibited in shows at the Phippen Museum of Western Art, Desert Caballeros Museum, and Trappings of the American West.
The timeline of the 7Up Ranch, where Kathy starts this book, is impressive. While the first settlers staked their claim in 1880 as part of the westward expansion effort of the United States of America, history doesn’t really start there. Kathy shares the early history of this location, long before the white homesteaders came west. From there, the history is long and storied with many twists and turns, literally and figuratively. Kathy outlines the ranch’s history in a way that draws the reader into the story and urges them forward. Kathy shares that she felt some sort of magic upon her first visit to the ranch in 1995. As the reader continues, her expert use of imagery, realism, and abundant creativity clearly paints the picture of that magic for her readers.
The history of this ranch could fill a book all on its own, but when she set out on this endeavor, Kathy intended to share the recipes used to feed the cowboy crews through the many years of cattle work. With deep roots planted in Louisiana thanks to Kathy’s husband Swayze, many dishes have a Southern influence, including the first recipe in the book, which outlines how to make a roux. The chapters roll on as Kathy shares appetizers and drinks, including Rocky Mountain Oysters, of course, and main course dishes. Chapter 17, which focuses on beef and pork is obviously our favorite including recipes for roasts, gravy brisket and even a stir-fry! Many recipes come with a story sharing what makes the recipe unique to the 7UP and the people who have populated it over the years. These stories are easily added to the readers’ experiences as they try out each dish at home or on their own ranch.
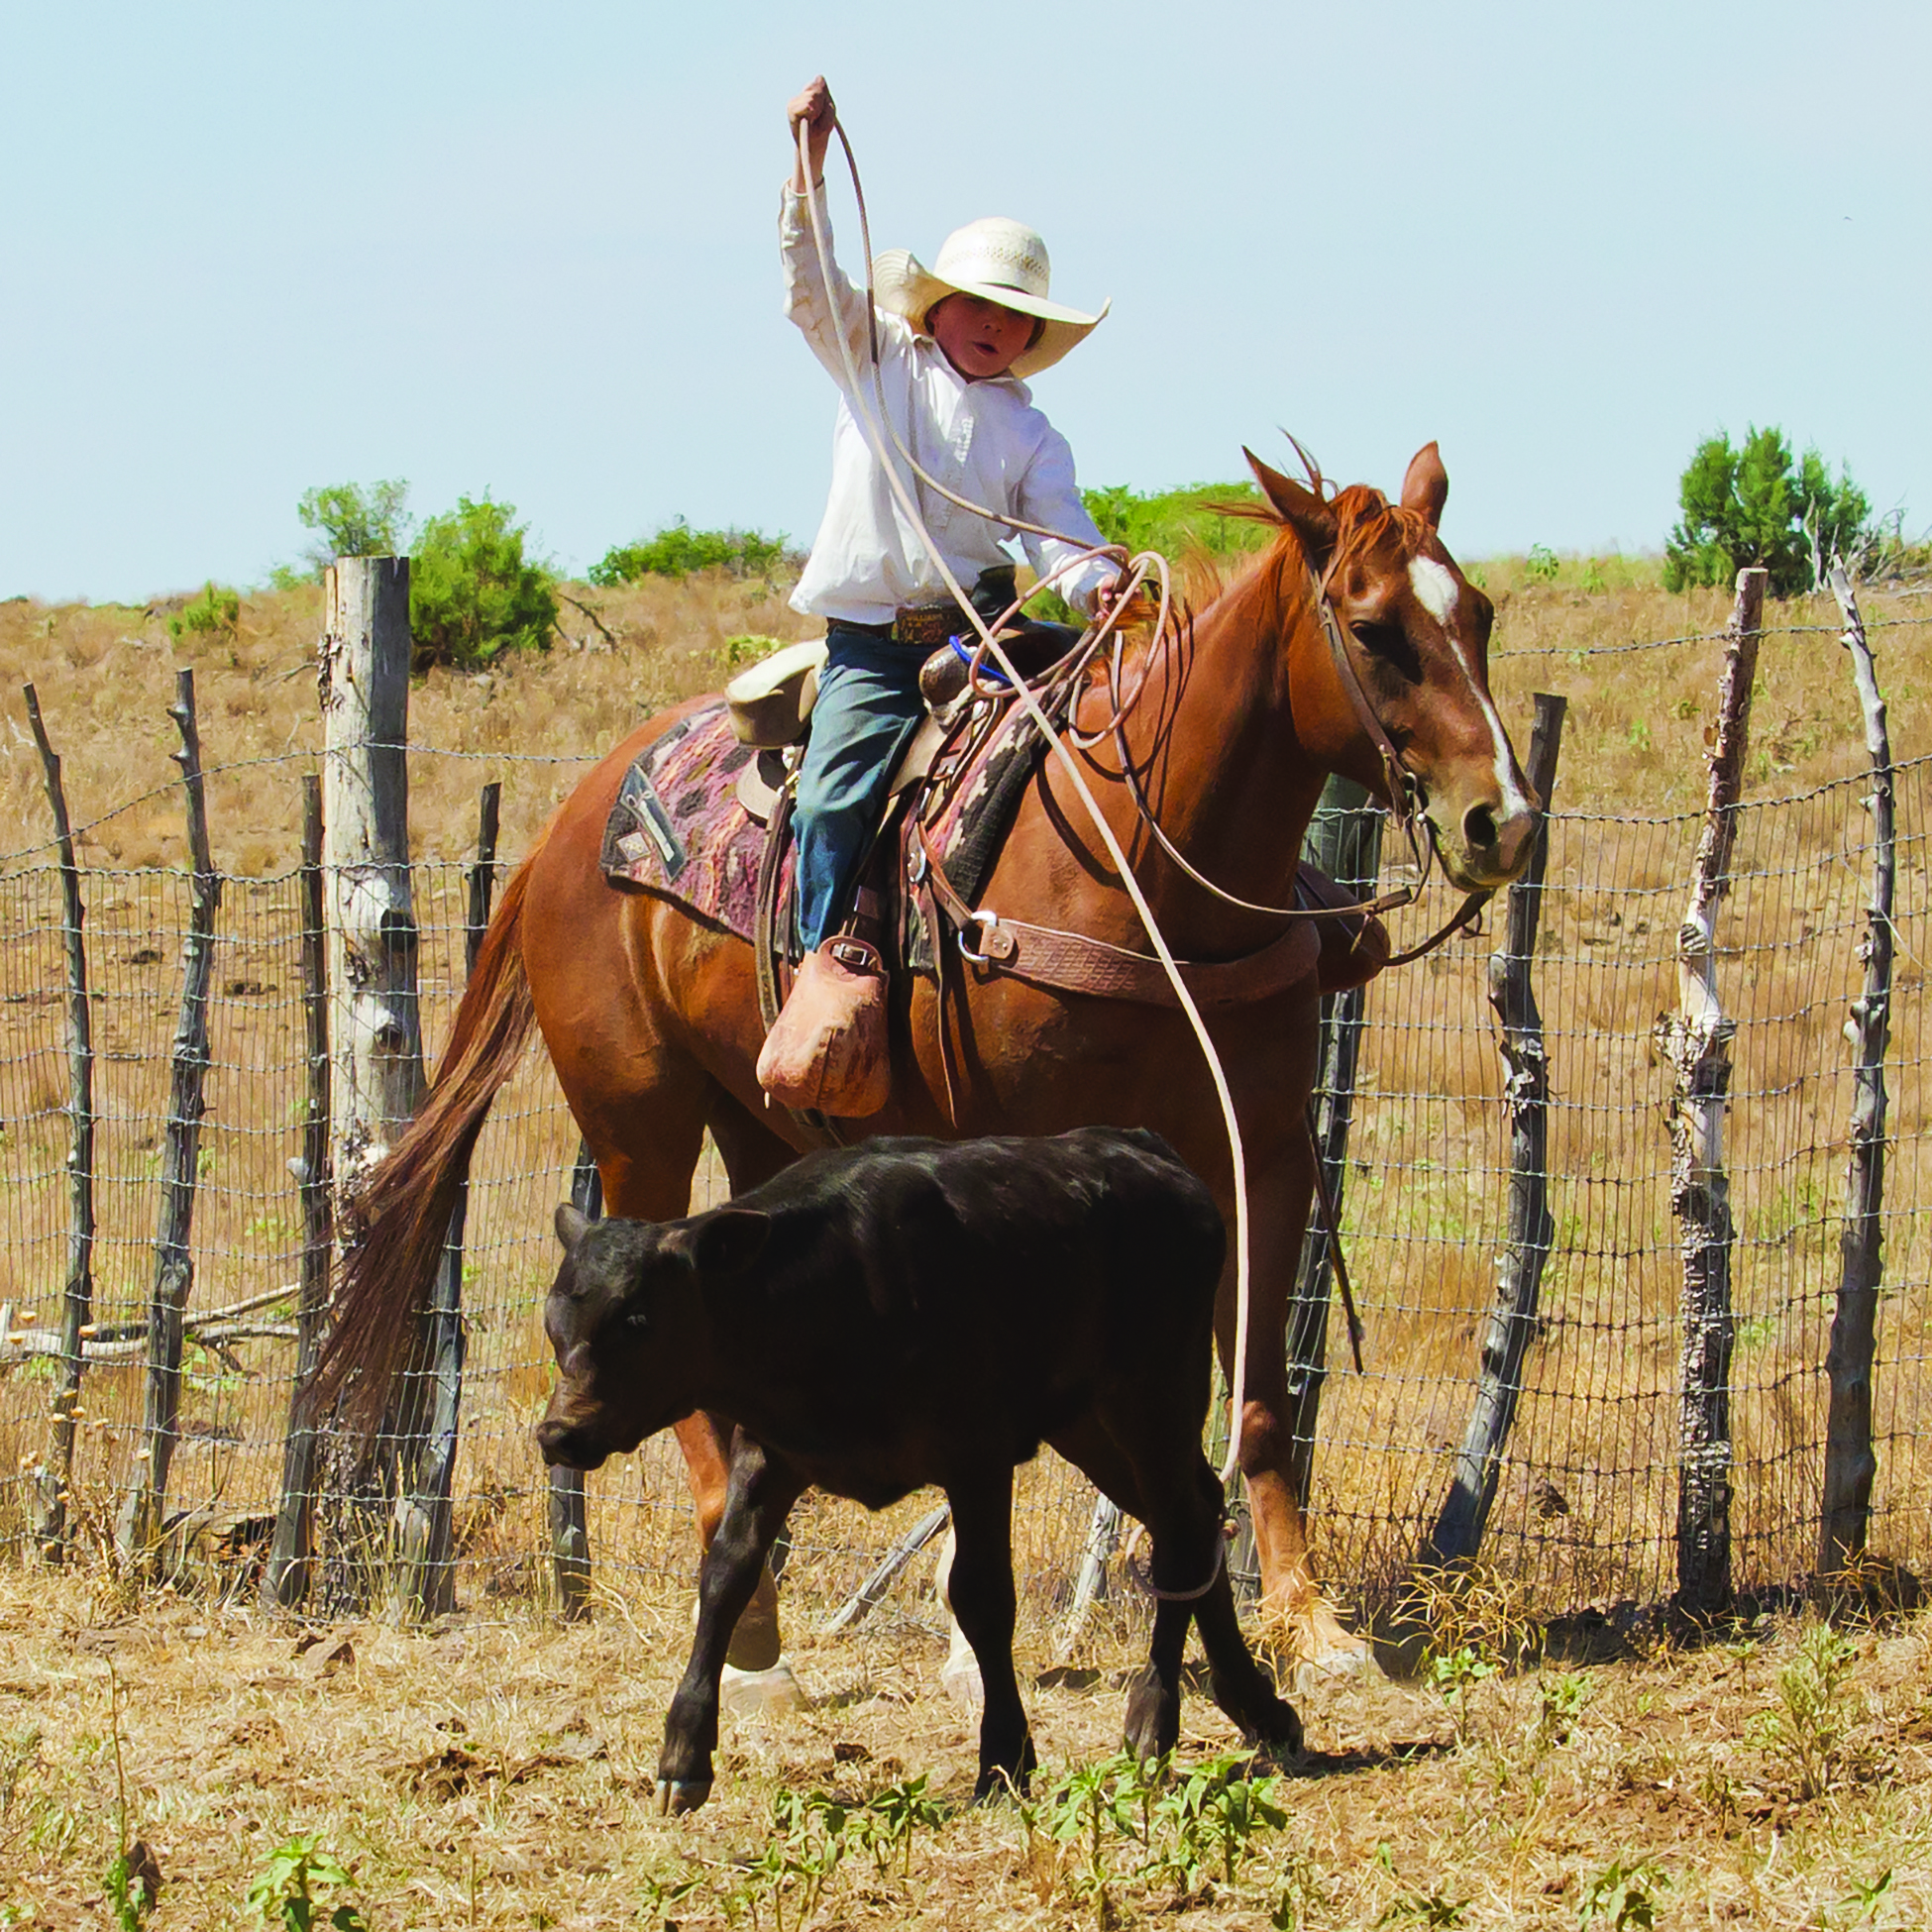
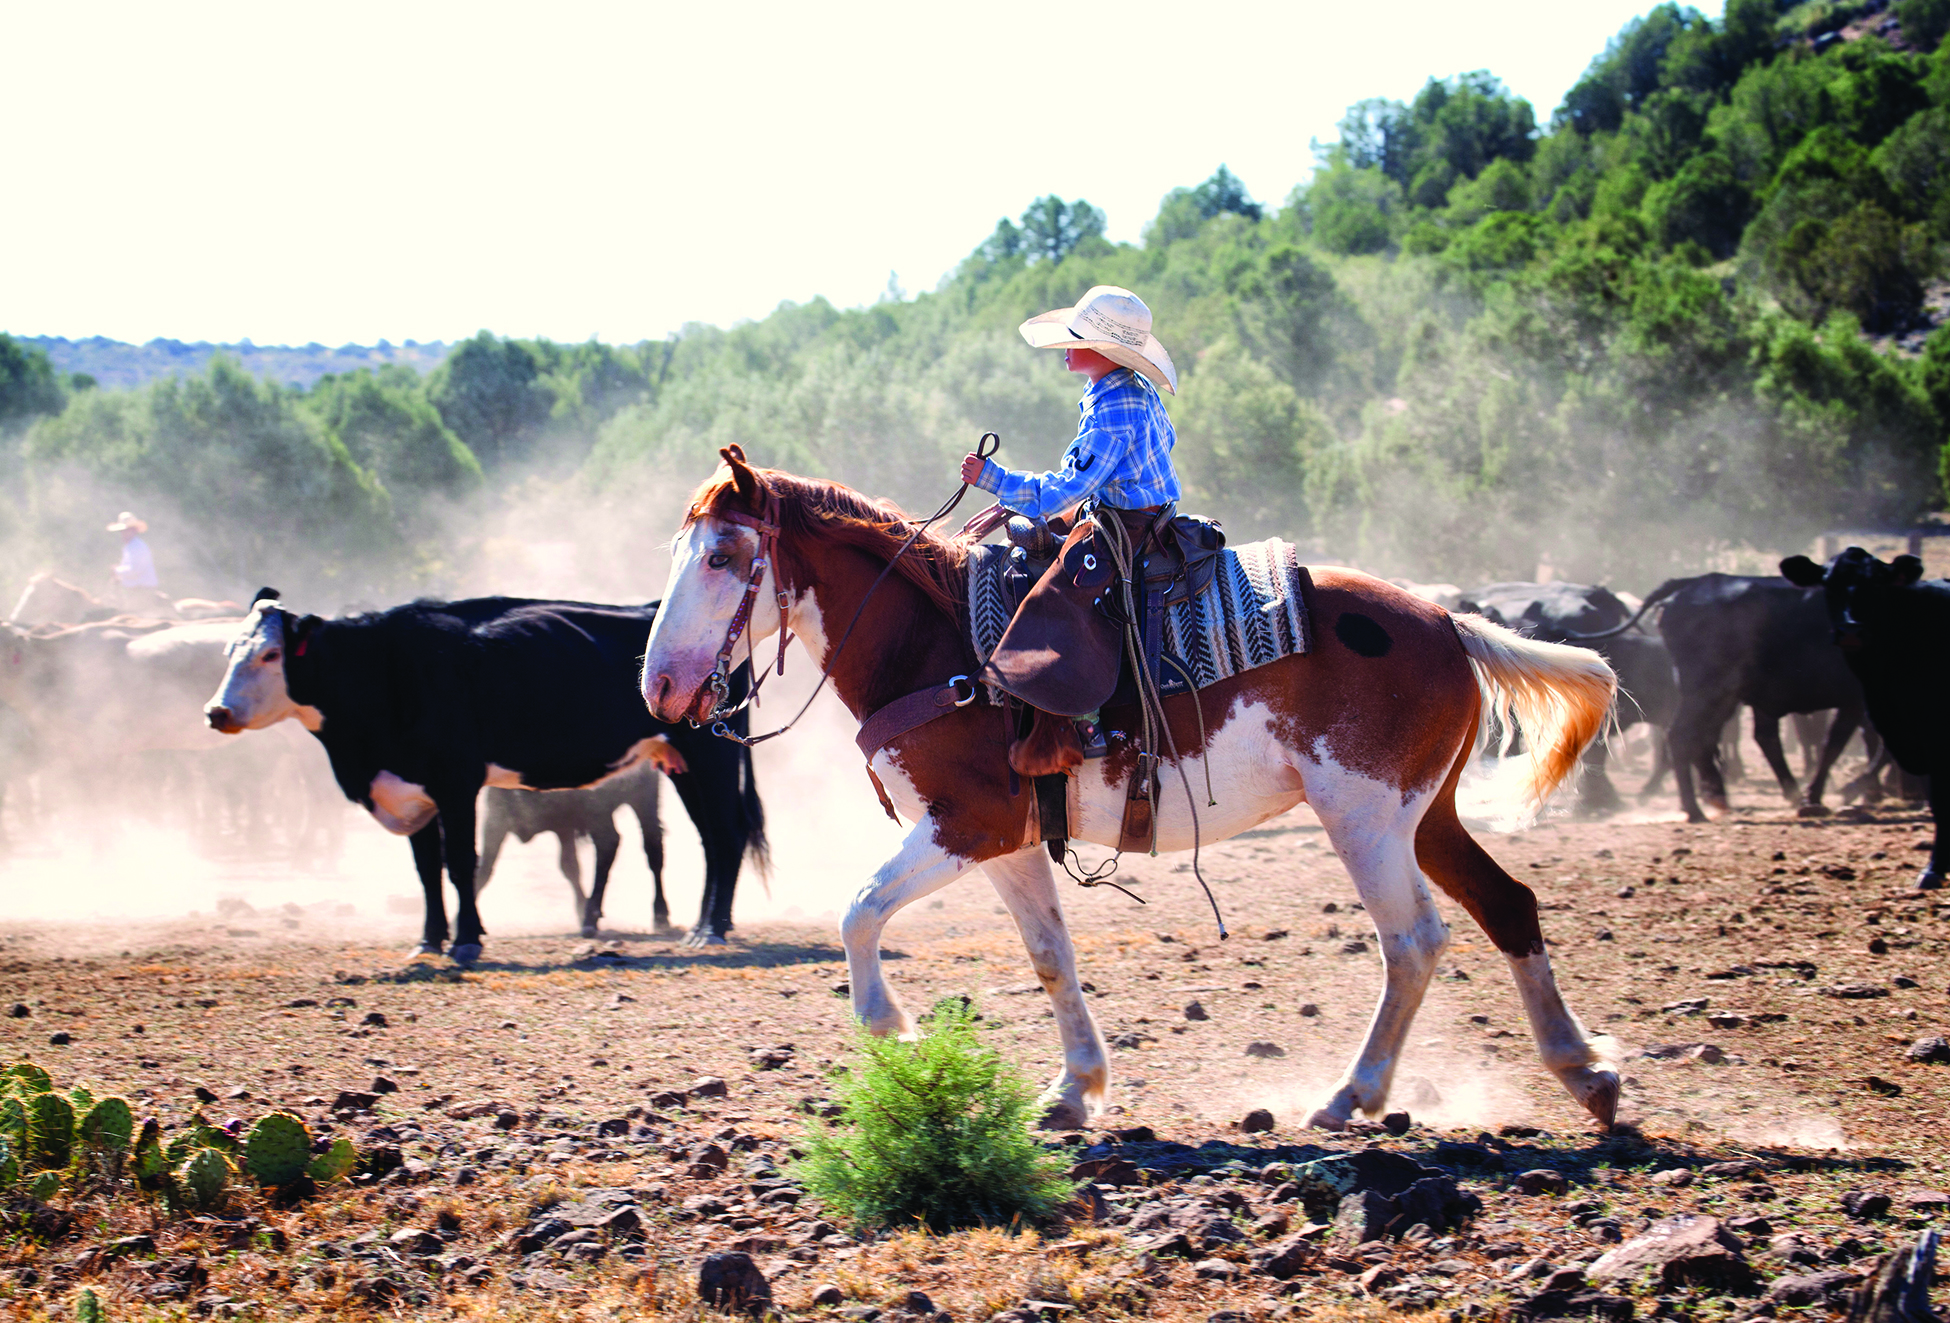
Kathy writes in a way that brings the reader to that moment, and her photography gives you the actual view. Her talented eye is showcased throughout the book in her many photos of the cattle, horses, landscape, and people who make up the 7UP Ranch. From roping in the branding pen, driving cattle across the countryside, and all the way to the cooks over the fire, the photos help the reader and the curious chef who uses some of the recipes feel like they are there.
A printed history of the 7UP Ranch, working to ensure that the past is preserved and remembered for generations to come, is an essential contribution to Arizona and ranch histories. Still, Kathy took it further and included the food from all those years. Food often brings people together after a hard day’s work and gives time for relaxation, planning for the future, and some good belly laughs while remembering comedic events from the day. It’s a chance to share the heroic, exciting, and scary stories that the whole crew may not have witnessed. It’s a time to connect with our fellow human beings. Kathy’s book is a beautiful combination of history and delicious food, giving her readers a chance to make their own history with the recipes enjoyed by cowboys, and now, one’s family.
Our friends over at Beef Lovin’ Texans and Vianney Rodriguez of Sweet Life, who makes what can be a complicated recipe easy, have generously allowed us to share all of this delicious tamale content! Many thanks!
This blog post content is coming to you straight from the Sweet Life. Check out the original post HERE. Be sure to check out her other delicious beef recipes!
If you are nervous about making tamales at home, no need to worry. Today, I am sharing all my tips & tricks to set your mind at ease when attempting tamales at home.
My first tip – break up the process by prepping ingredients a few days in advance. Breaking up the prep as much as you can in advance helps to make the process of making tamales at home manageable. Breaking up the process does not leave me feeling overwhelmed the day I assemble/steam the tamales. This post is a collaboration with Beef Loving Texans on behalf of the Beef Checkoff.
Let’s begin with the corn husks.
CORN HUSKS/HOJAS
What are corn husks? Corn husks are the outer covering of an ear of corn. They are dried and used in making tamales or to encase foods to be steamed. You can find corn husks year-round here in Texas, pero come December you find them located near the produce area, in huge displays along with dried chile ancho. Look for bags of corn husks: free from tears, free of moisture (which causes the husks to mold) and free of debris. Corn husks are used to make tamales, they hold the tamales together and help keep them from drying out. The corn husks allow the steam to penetrate while the tamales cook. You can also find dried corn husks online.
The evening before you are set to make tamales, remove your corn husks from the package. I like to give them a quick look over, to remove any debris, threads, molded corn husks, or torn husks.
Place your husk in a large bowl or container. You want plenty of room for when you add the hot water.
You can use a cooler, ice bucket, a stockpot, or your sink. Clean each container thoroughly before adding corn husks.
Before we add the corn husk to our container give them a quick rinse under cold water to remove any dirt, dust collected in shipping/storage and any threads.
Place corn husks in the appropriate container, then top with hot water. You will want to weigh down the husks, so they do not float to the top – you want the husks to be submerged in the water the entire time.
I use my Abuelita’s molcajete, but you can use any heavy pot, a Dutch oven works well. I like to soak my corn husk overnight since we make a TON of tamales, but if you only plan to make a few dozen you can soak the corn husks for at least two hours in hot water. You want the husk to be soft and pliable, ready to wrap your tamales.
When you are ready to assemble your tamales, remove corn husks as needed leaving the remaining to soak. Place on a baking sheet, cover them with a damp paper towel to help retain their moisture. If the corn husks begin to dry out, return to water and allow to soak.
Let’s talk about the filling for our tamales.
The brisket filling can be made up to four days in advance. A trimmed brisket works best for this recipe as we want a little fat, but if you have ever cooked a brisket there is a thicker layer of fat near the gristle. You can trim at home or ask your local butcher to trim for you.
Slice the brisket into larger square cuts, this will make for quicker cook time and make for easier shredding. We are seasoning our brisket with onion, garlic, peppercorns. The garlic will be combined with shredded brisket, so feel free to add the cloves whole to the pot, not minced or chopped. Simmer for about 3 hours or until fork tender. Carefully remove cuts of brisket to a cutting board and shred/slice with a knife or two forks. I find using a large chef’s knife works best for brisket.
The chile paste
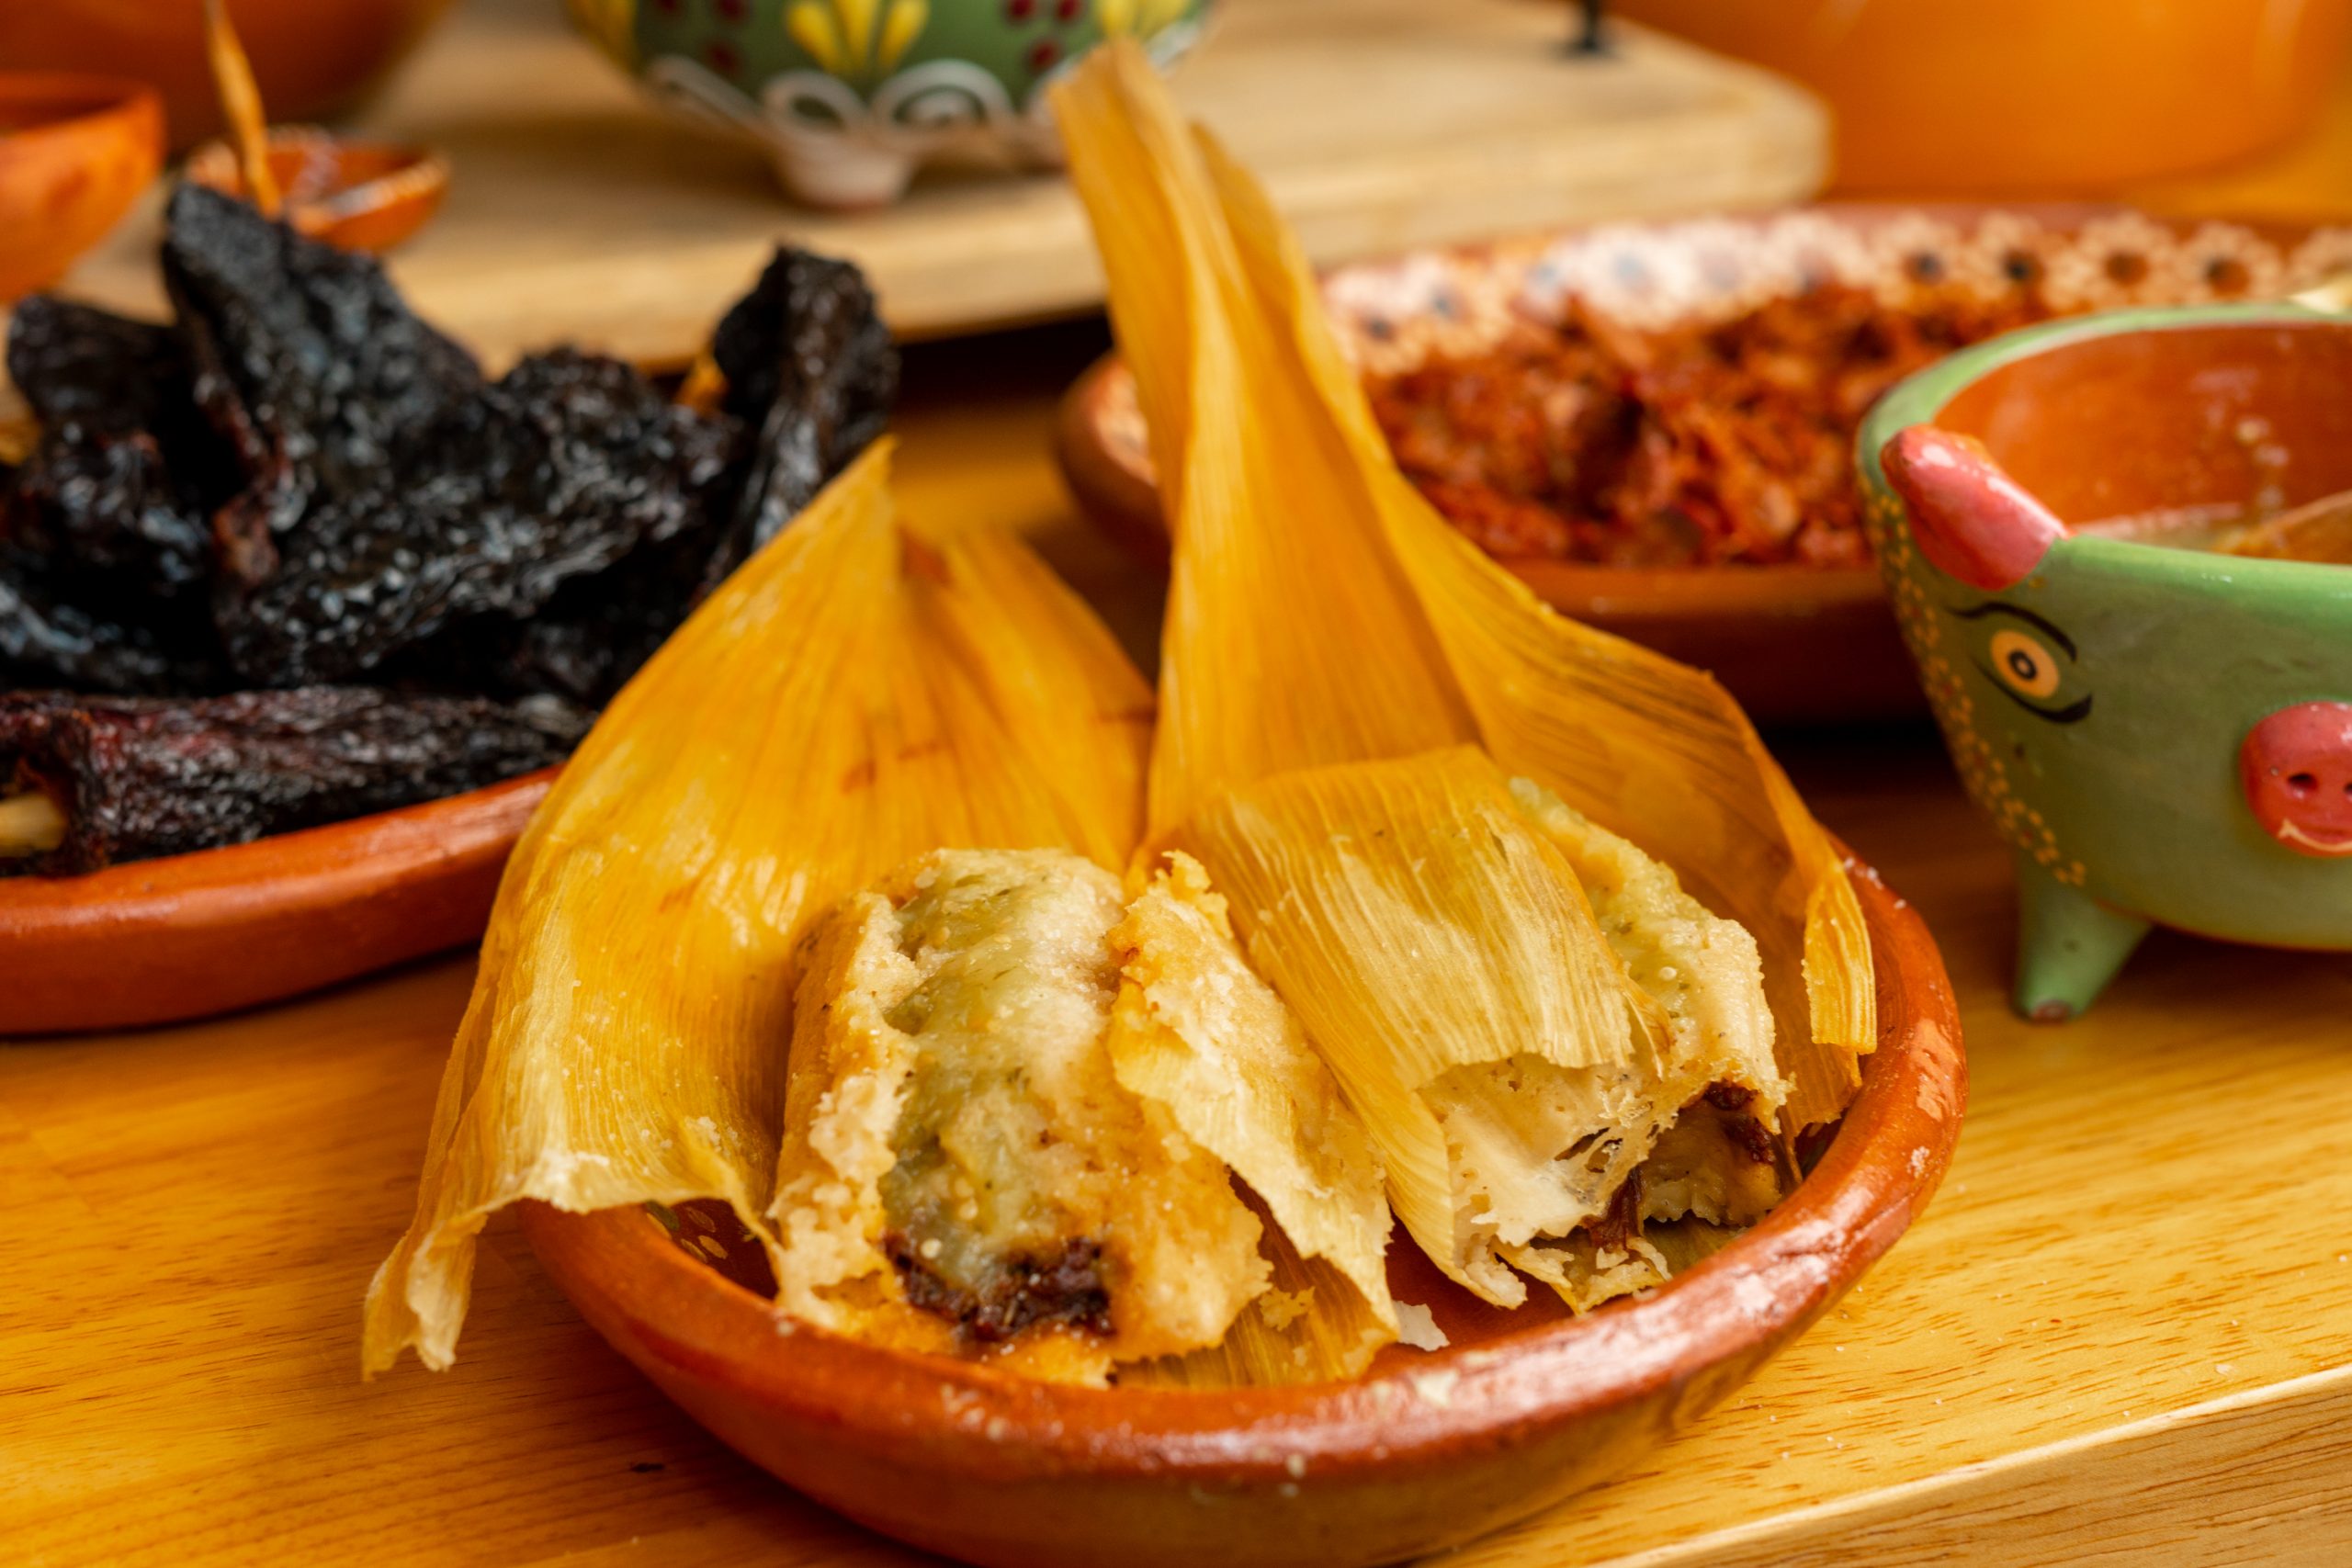
Ancho chile paste will be added to our shredded brisket. Ancho chiles are dried poblano peppers. They have a smoky, sweet flavor and used to make pozole, moles, marinades, and tamales. We are rehydrating our chile ancho so they will blend easily in the blender. To our pot, we are adding comino seeds (cumin seeds) along with our chiles. You can boil over the stove-top or place your chile and comino seeds into a microwave safe dish and microwave until chiles have softened.
When they are cool enough to handle, slit them open and remove seeds and veins. Place in a blender along with comino seeds and blend until a paste is formed. Next, we will fry the chile paste. Frying the chile paste adds a depth of flavor and gives our filling amazing flavor and color. Sauté chile paste for about 3 minutes stirring all the time. Add beef and garlic, continuing to cook for the flavors to meld. Add ½ cup of the broth and let the mixture cook for about 10 minutes over a medium flame. Season filling with salt as needed. The ancho chile paste can be made up to four days in advance. You can also make chile paste, fry, and add shredded brisket up to four days in advance. Store covered in fridge until ready to assemble tamales.
Let’s make masa
MASA
What is Masa? Masa translates to dough, masa is used to make much more than tamales, it is a powerhouse ingredient in Mexican cooking. Masa is used to make tortillas, gorditas, sopes, huaraches, tylaudas and sopes.
Masa is a dough made from finely dried corn kernels that have been soaked in an alkaline solution, which roughly translates to limewater which softens down the corn, which then is grounded down to make masa.
Here in South Texas, fresh masa can easily be found during the holiday season at tortilleras and bakeries, or the local Mercado offers freshly ground masa.
You can buy fresh masa in three forms:
Preparada, which means it is seasoned with spices and ready to use.
Regular, which means you will add seasoning to the masa, where you can customize your family’s recipe.
Masa Harina, (masa flour) which is like flour, but water or broth is added to quickly form a masa ready to be used to make masa. Think of it as “instant” flour. Just add water or broth and you are ready to make tamales, tortillas, gorditas, sopes, huaraches, tylaudas and sopes. You can find it in the Latin aisle of your local grocery store. This is what we will be using for today’s recipe.
How to prepare masa for tamales:
Preparing your own masa for tamales sounds daunting, if you have never attempted it, but I promise you it is worth it, plus think of all the deliciousness you will be creating.
I like to prepare my masa a day before assembling my tamales, so we are ready to spread the day of.
The key is you want to break up any clumps while preparing your masa fully incorporating in the spices, chile sauce or lard you are mixing it. You want your masa to be smooth and easy to spread.
You can prepare your masa in a stand mixer. This is how I prepare my masa. It makes for easy prep since I prep a ton of masa. Try not to overload your mixer to avoid spillage. First, we melt the lard, add our masa harina to our mixer along with the salt, baking soda, broth, and the lard (one cup at a time). Continue beating for 10 minutes until the masa is nice and smooth. To test if masa is ready for spreading: Drop a dollop of masa in a glass of cold water. If it floats, you are ready to spread, if it sinks add more lard and continue mixing.
Store your prepared masa, covered in the fridge until ready to use, for up to three days. When ready to spread, allow masa to come to room temperature for easier spreading.
Now that we have our masa & filling ready, let’s assemble our tamales.
Assembling the tamales:
I find placing the damp corn husks on the palm of my hand makes for easier spreading. Using a spoon or knife spread your masa over the broadest part of the corn husk, allowing for turning down about 2 inches at the pointed top. Spread the masa approximately 3 inches wide and 3 ½ inches long.
Next, with a fork or spoon add some beef filling down the middle of the dough (about 1 Tbsp.). Fold the sides of the corn husks together firmly. Fold up the empty 2-inch section of the husk, forming a tightly closed “bottom” and leaving the top open. Place assembled tamales on a baking sheet or baking pan, cover with a damp towel until you are ready to place in a steamer.
Let’s cook and enjoy our tamales.
Cooking the tamales:
Fill the bottom of a tamales steamer with 1 inch of water and bring to a boil. If using a tamales steamer, fill the steamer with water just until you hit the level where the steam rack sits.
Stack the tamales upright, with the folded part down at the bottom. Pack firmly but not tightly. Cover the tamales with more corn damp shucks and cover steamer.
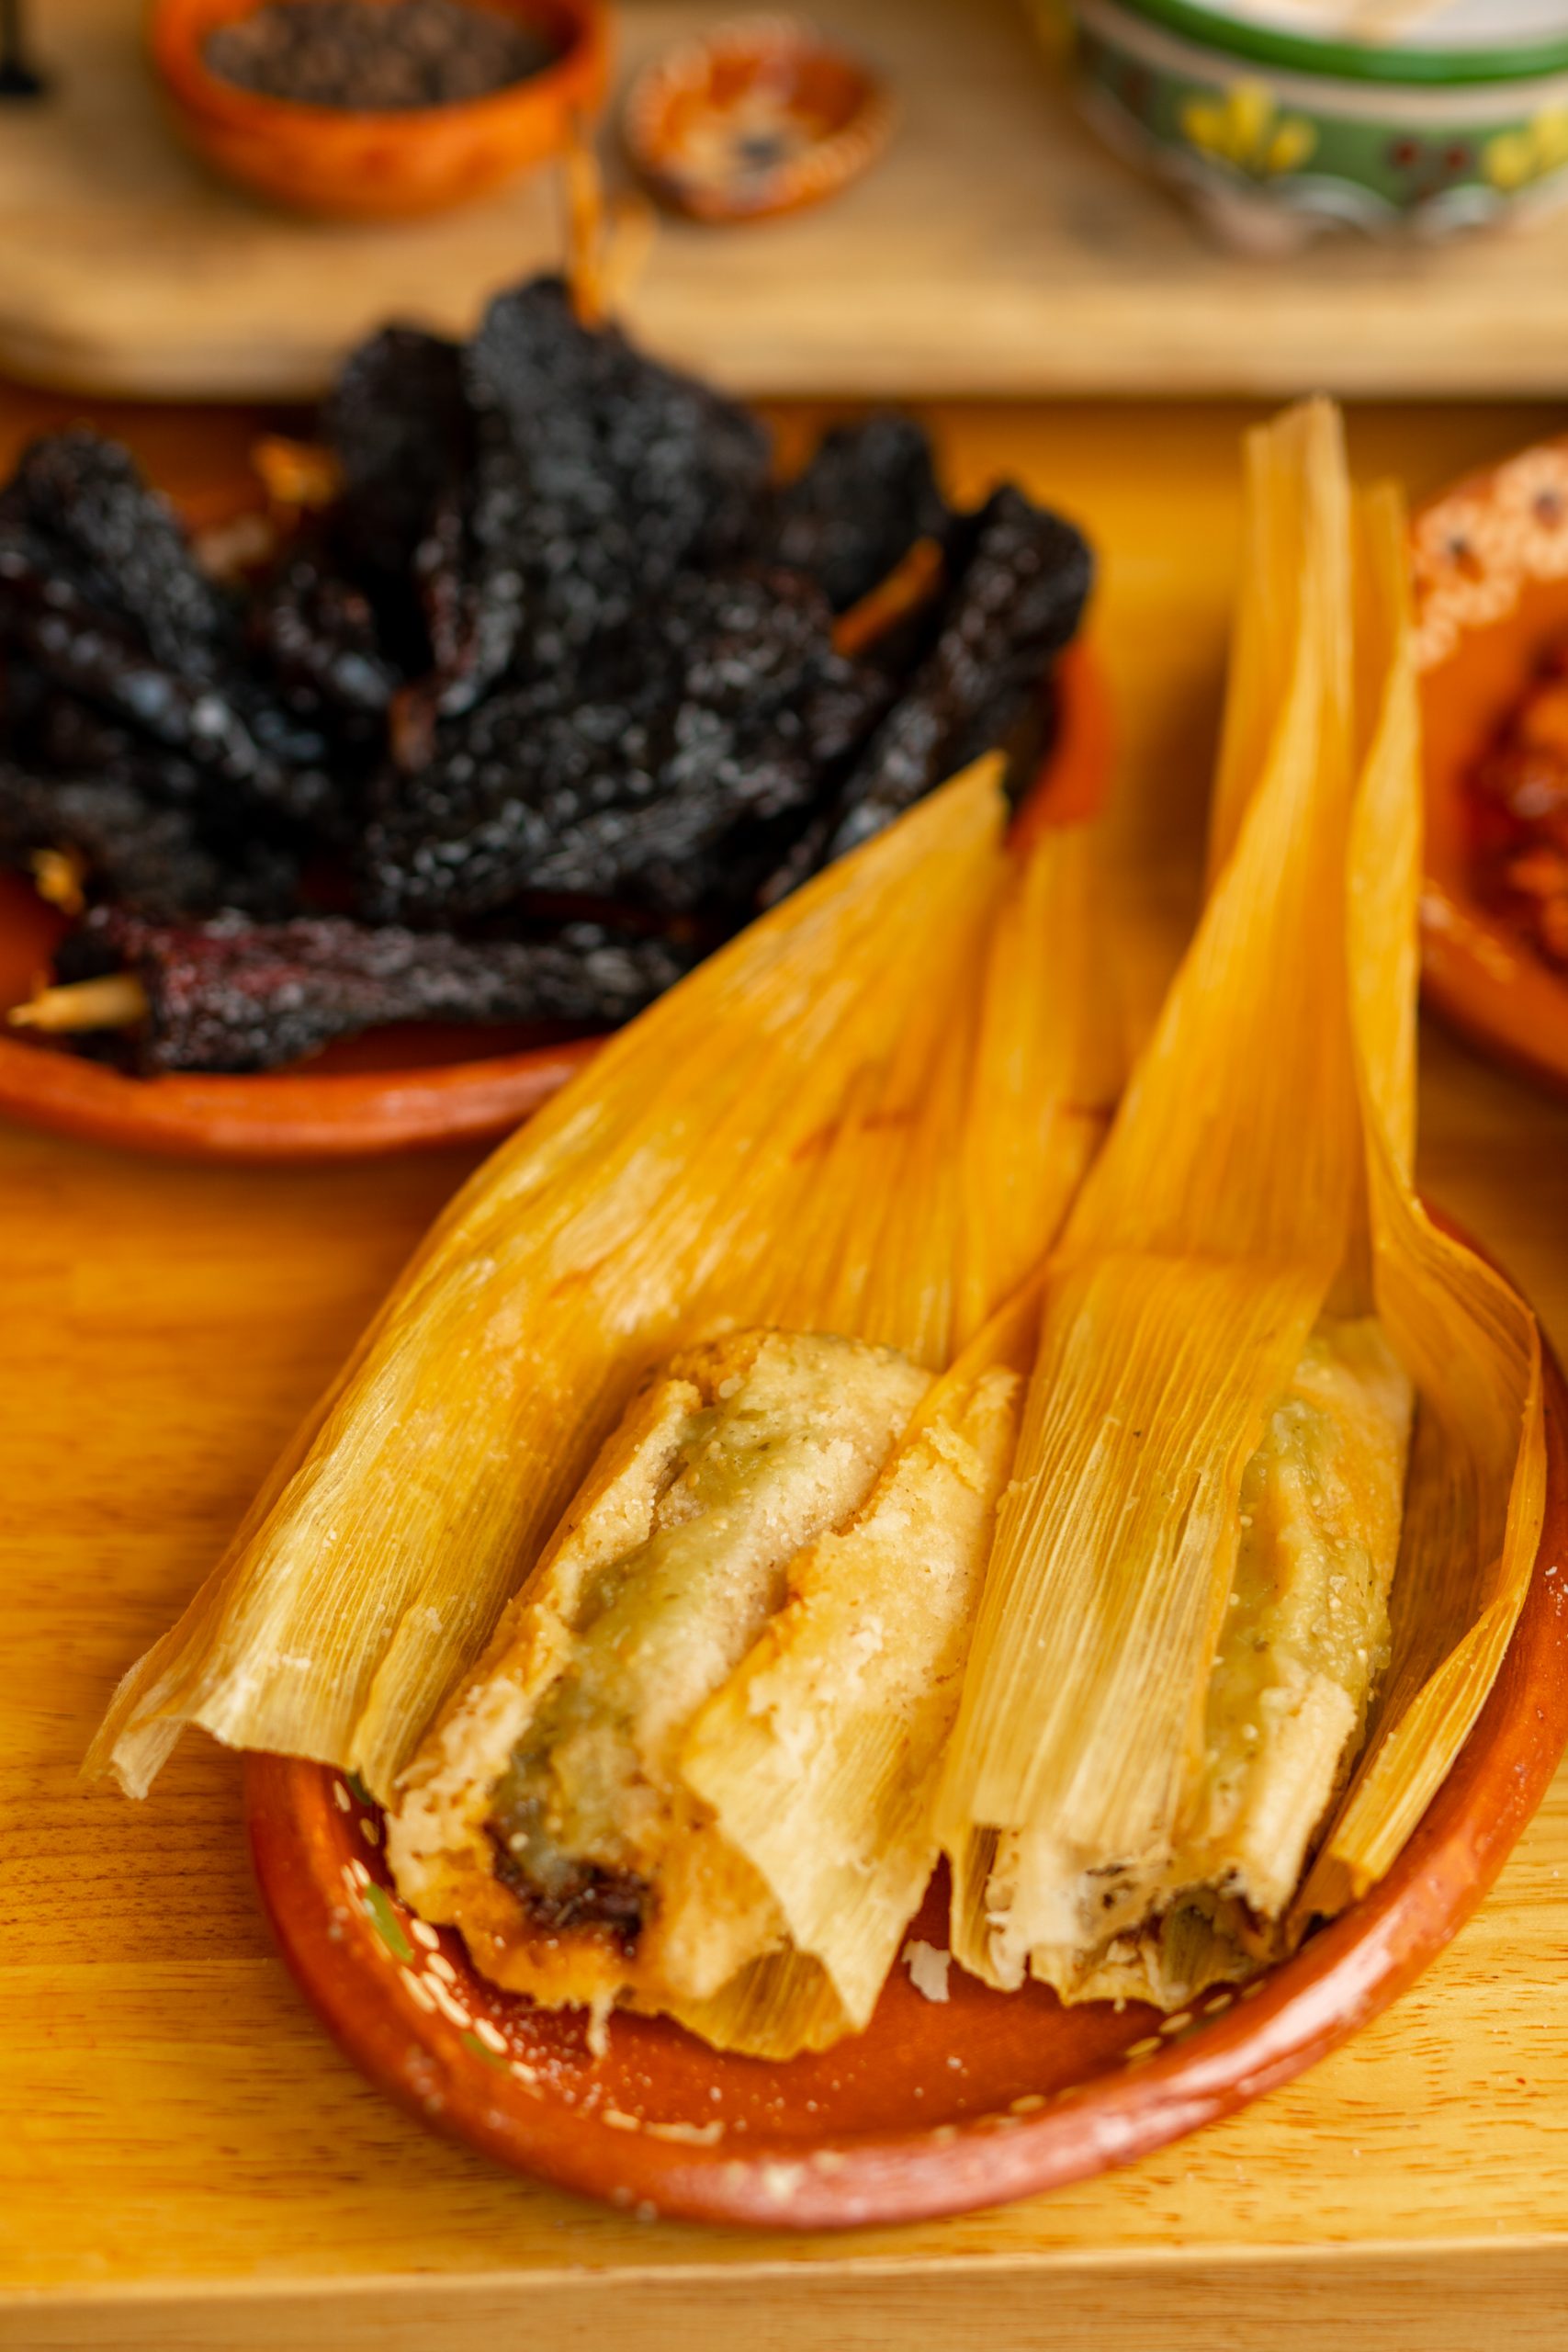
Cook tamales for about 1 ½-2 ½ hours over a medium flame. To test the tamales for doneness, remove one from the center, and one from the side of the pot. Tamales are done when you open the corn husk, and the masa peels away easily from the shucks and the tamale is completely smooth.
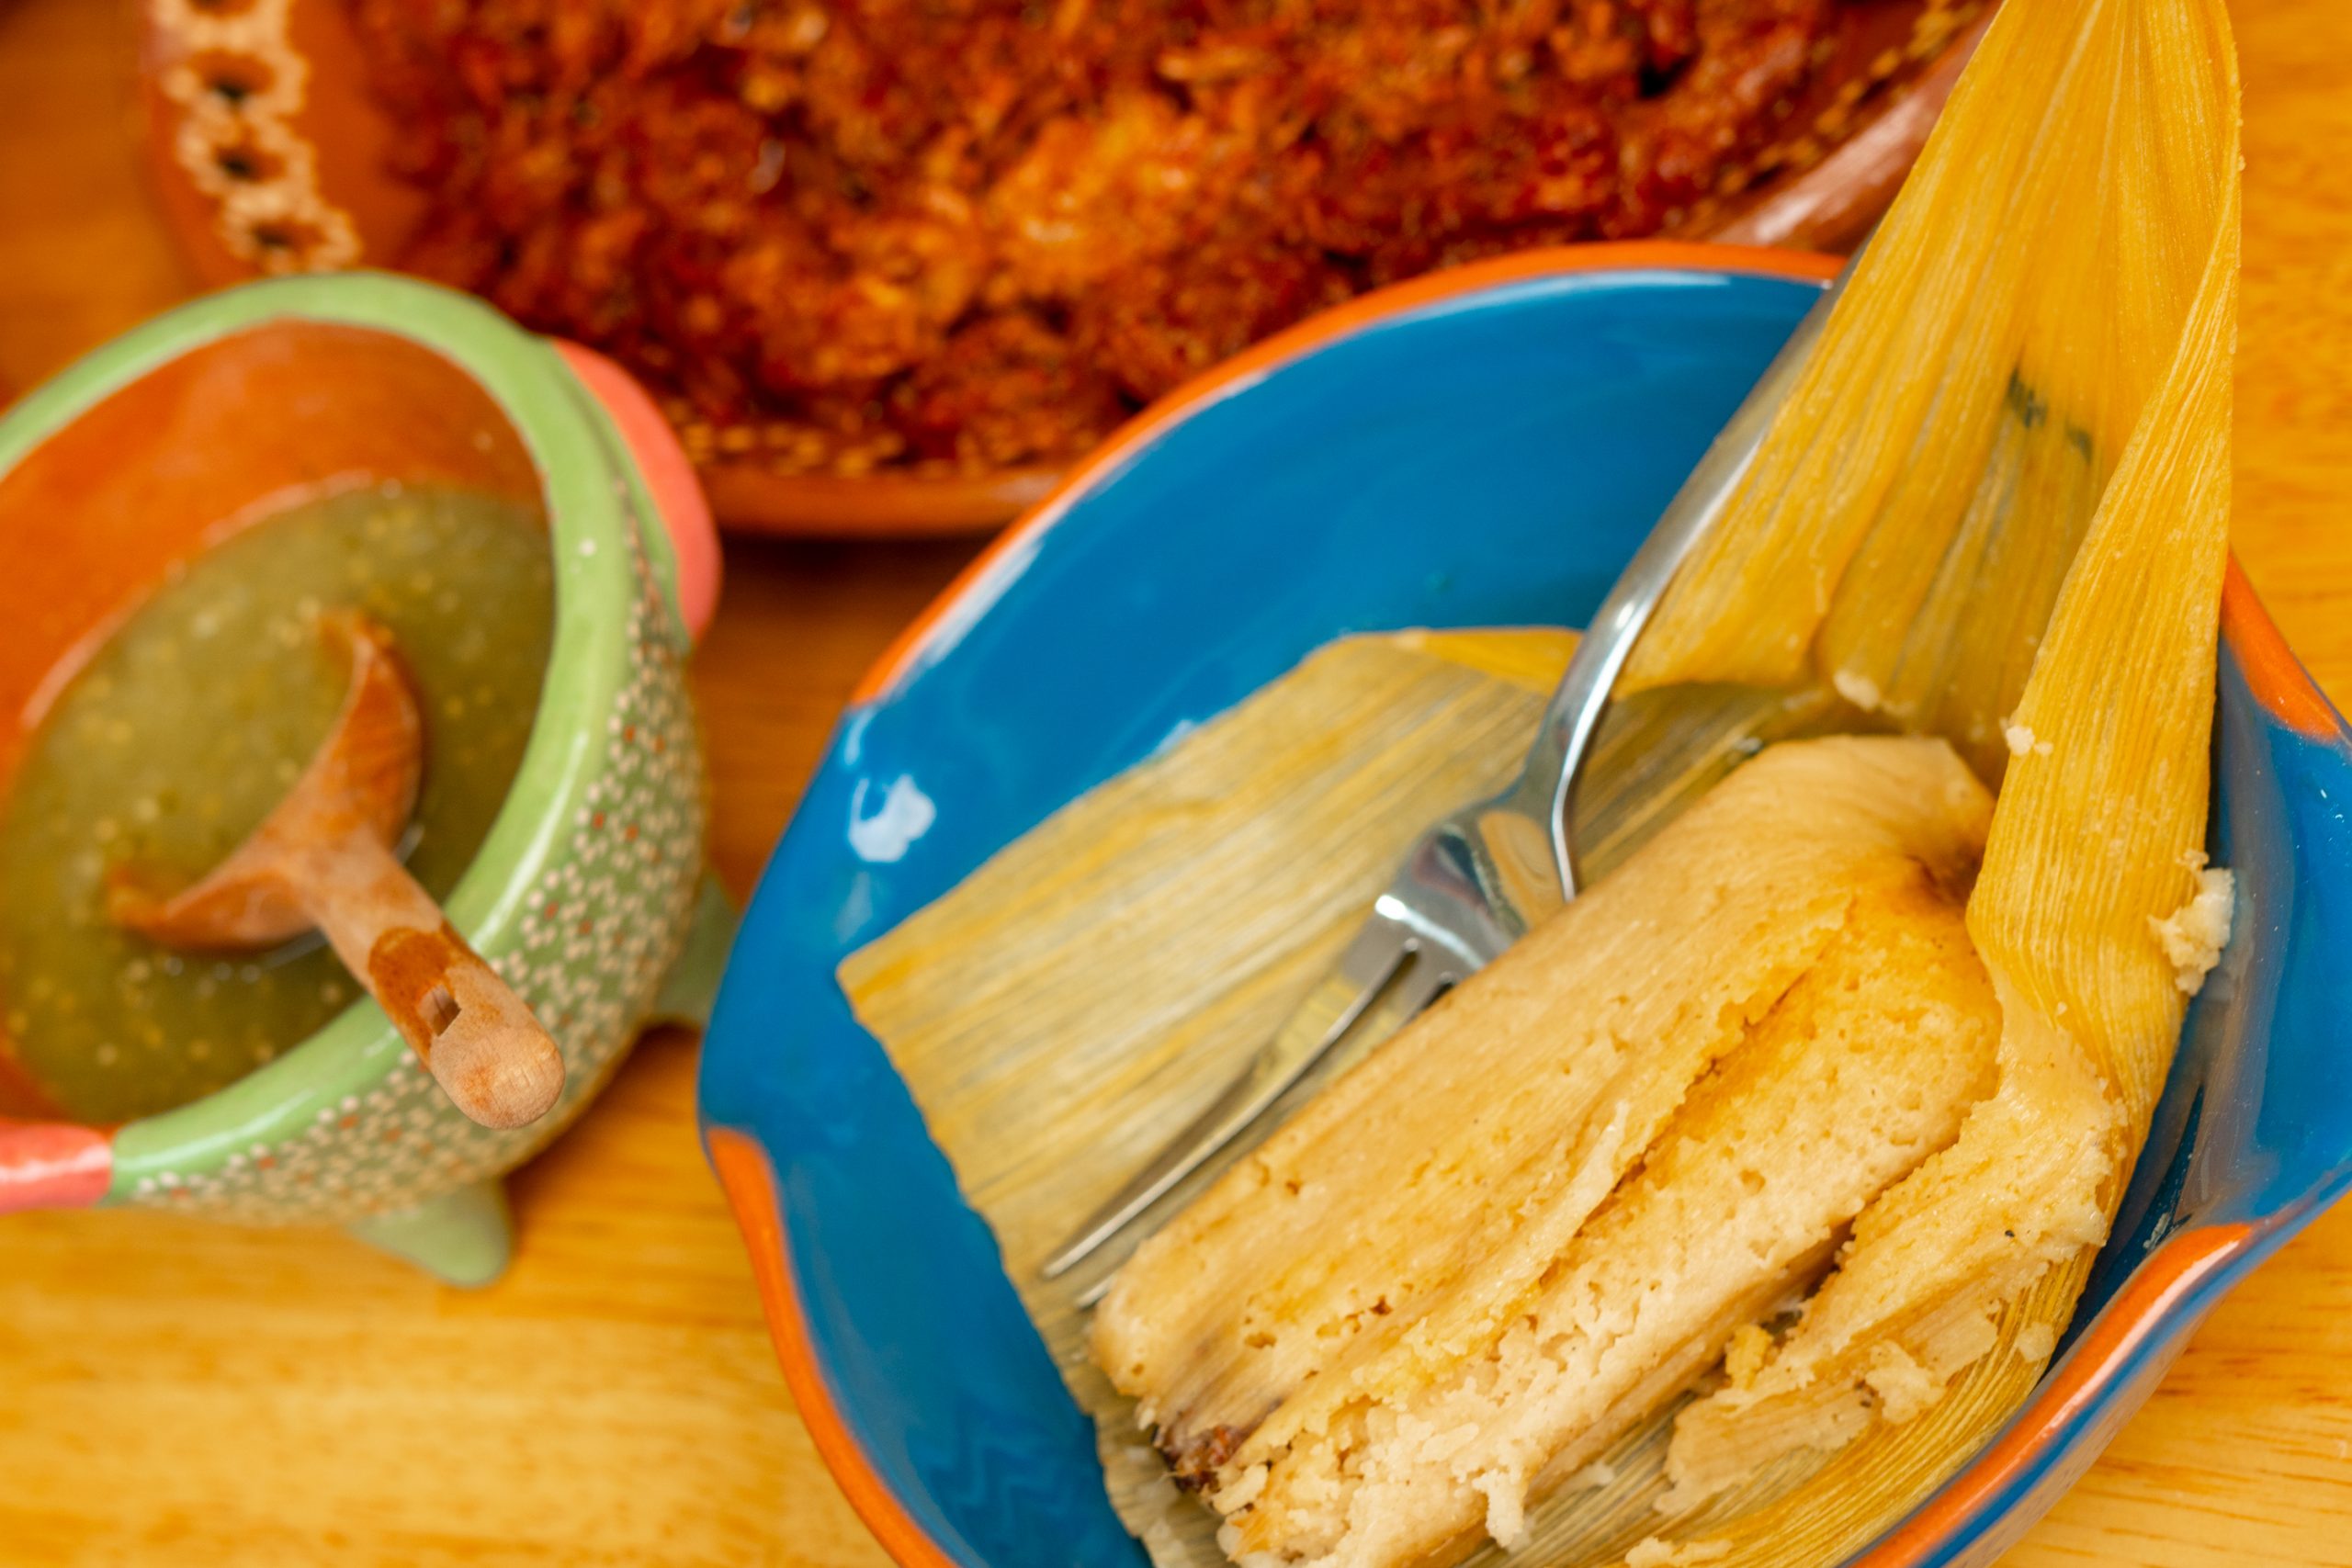
Serve warm with plenty of salsa.
I hope this helps ease your mind of making tamales at home. Prepping in advance and having a few extra hands on-hand will make assembling tamales at home a breeze. Plus, nothing beats a steamy homemade tamale straight from the steamer. I am also including a video below that features each step to help you see the entire process.
Authentic Beef Tamales
If you are nervous to make tamales at home, no need to worry today I am sharing all my tips & tricks to set your mind at ease when attempting tamales at home.
Author: Vianney Rodriguez
Ingredients
BEEF FILLING
6 lb. brisket
1 onion
6 cloves garlic peeled
3 tsp. salt
6 peppercorns
8 dried ancho chiles
1 Tbsp. comino cumin seeds
Water to cover
½ lb. lard (Healthier option: 1 cup canola oil
MASA
6 lbs. masa from tamale factory OR
4 lbs. masa harina
½ lbs. lard Healthier option: 2 cups canola oil
6 tsp. salt
1 tsp. baking soda
2 cups of broth from beef filling
CORN HUSKS/HOJAS
3 pounds corn husks/hojas
Hot water to cover
Instructions
CORN HUSKS/HOJASHojas are corn husks that are dry and papery but usually clean of silks, trimmed, flattened and ready for use. To soften them, pour plenty of very hot water over them and leave to soak for several hours or overnight. Shake well to get rid of excess water and pat them dry with a towel.
BEEF FILLINGCut the brisket into large squares and put into a large pot with the onion, garlic, salt, and peppercorns. Cover the beef with water and bring to a boil. Lower the flame and simmer until tender – about 3 hours.Set the beef aside to cool off in the broth. Strain, reserving the broth, and chop beef with garlic roughly.Cover chiles and comino seeds with water and bring to a boil. Let them stand until chiles are soft and water cools. When they are cool enough to handle, slit them open and remove seeds and veins. Using a molcajete or a blender to grind/blend them along with the comino into a paste.Melt lard, add chile paste and sautée for about 3 minutes stirring all the time. Add beef and garlic, continuing to cook for the flavors to meld. Add ½ cup of the broth and let the mixture cook for about 10 minutes over a medium flame. Filling should not be watery. Add salt as necessary.
MASAIf you get your masa from a tamale or tortilla factory, ask for masa for tamales or masa quebradita. If you use masa harina, get the one for tamales and follow the directions.Melt the lard. Use a large mixer to mix masa, salt, baking soda, broth, and the lard (one cup at a time). Continue beating for 10 minutes or so, until a ½ tsp. of the masa floats in a cup of cold water. If it floats you can be sure the tamales will be tender and light. If it doesn’t float, beat more melted lard into the mixture. Beat until fluffy and semi-shiny. Masa should be of a stiff consistency but spreadable.
MAKING THE TAMALESUsing a Tbsp. or a knife spread a thin coating of the masa over the broadest part of the corn husk, allowing for turning down about 2 inches at the pointed top. Spread the masa approximately 3 inches wide and 3 ½ inches long.Spoon some beef filling down the middle of the dough (about 1 Tbsp.). Fold the sides of the corn husks together firmly. Fold up the empty 2 inch section of the husk, forming a tightly closed “bottom” and leaving the top open.
COOKING THE TAMALESFill the bottom of large soup pot or a tamale steamer with 1 inch of water and bring to a boil.If using a pot, either put a molcajete, bowl or ball of aluminum foil at the bottom of the pot and fill in with leftover corn husks. Stack the tamales upright, with the folded part down at the bottom. Pack firmly but not tightly. Cover the tamales with more corn shucks. Cover the top of the steamer with a dishcloth or thick cloth, or cover the pot with a tightly fitting lid.Cook tamales for about 1 ½-2 ½ hours over a medium flame. Keep water in a teapot simmering so that you can refill the pot when necessary. If you use a tamale steamer you should not have to add any more water.To test the tamales for doneness, remove one from the center, and one from the side of the pot. Tamales are done when you open the corn husk, and the masa peels away easily from the shucks and the tamale is completely smooth.
How does a dream come true? We all know it’s different from the movies and typically involves a lot more work than Hollywood would ever waste screen time on. But the Barnard family, who lives far from the silver screen, knows how. This whole #azbeef family knows that dreams come true through goal setting, hard work, and some serious perseverance.
Jason and Candice Barnard are Arizona ranchers and farmers in Cochise County, with agricultural roots from both sides of the family. Candice, an Arizona native, grew up in a farming family where white corn was grown and sent to California to be made into tortilla chips. Jason grew up in Texas and had family here in Arizona who farmed. As a kid, he would make the trek out every summer to spend time with his grandparents and help on the farm. After Jason graduated from college, he was fortunate to get into farming like his grandparents and came to Arizona for good. The Barnards are blessed with three children, Haidyn, 12; Hannah, 11; and Ethan, 3. The family has been at their current location in Portal, Arizona for 11 years and has built the business into something they had dreamed about.
Going back to how to achieve a dream, you could look at this family as a case study to answer that question. This dream really belongs to Jason, and as Candice and I talked, she mentioned a few times that it had always been Jason’s dream to incorporate cattle into their farming business. As with most plans, there were many naysayers who shared that farming and cattle just don’t mix, but Jason and Candice didn’t let that stop them.
Photo by Tim Lawson Photography
Their opportunity to get into the cattle business really started back in 2009 when a small feed yard became available to lease. They jumped on the chance and started feeding weaned calves (calves that have recently been separated from the cows) hay from the farm that had been rained on. A feed crop that had been rained on typically loses value but can be fed to cattle. This provided a chance to get into the cattle business while also feeding hay to the calves, which didn’t hold much value elsewhere, allowing them to convert that into high-quality and nutritious beef.
Since these humble beginnings, the feed yard side of the farm has grown and blossomed. Not only do they feed their own weaned calves, which they raise on some leased grazing land nearby, but now they also can take customers’ cattle to do custom feeding. They also work with larger companies to supply animals for harvest and are proud to say they are doing a direct-to-customer business.
Many technologies and innovations help the Barnards to do their job in the best way possible. One of those is the feeding program they use, which allows them to properly mix the feed rations (the mixture of grains, hay, and other nutrients fed to their cattle) so cattle are getting all the minerals and nutrients they need to help them grow and stay healthy. This program does more than that, though! With a few inputs of information by the user, this app allows them to know how much to mix and how much to give to each cattle pen. It doesn’t stop there. When the actual feeding is happening using a feed truck, it weighs out how much each pen of cattle needs. Not only does this help to make the job more efficient, but it also ensures less waste.
Photo by Scott T. Baxter Photography
Another item that Candice says is very helpful for their business is the RFID tags, which stand for radio-frequency identification tags. These ear tags are put into a calf’s ear, much like an earring is put into a human. But unlike an earring that we might wear, this RFID tag contains a tiny radio transponder, which can be activated with a reader. This allows the Barnards to scan the ear tag with a quick swish of a wand (not actual magic, the wand contains a radio receiver), which brings up an individual number assigned to that particular animal. The information can be entered into a computer program about that animal. Every aspect of the animal’s life is recorded, including any change in feed ration, if it is given medicine, and when regular health protocols take place, notes are made with the unique number attached. This level of record keeping and transparency is increasingly important to beef consumers and also aids in food safety.
The Barnard children are no strangers to dreams and goals. The two oldest children have a unique, fun, and educational book that they helped write and complete called Farm Kids, Growing Up WhiteBarn. This book takes readers through a day in the life of these hard-working kids and all they do to help their family raise healthy and delicious beef.
So, what have we learned from this tenacious family, and how to achieve our dream? Set goals, keep going, and use the tools you have but don’t be afraid to invest in new ones, and don’t give up. Thanks to the Barnard family for this valuable lesson and for raising delicious and nutritious Arizona beef.
Are you ready for the big game? Still need a few appetizer ideas to keep everyone fed and coming back for more during the commercial breaks? Check out this list of easy and delicious beef recipes, and then your playbook is set!
Bump up your meatball mojo. Gently form this tried-and-true blend into bite-sized balls, then broil and slather in a spicy, sweet and too-good-to-be-so-simple sauce.
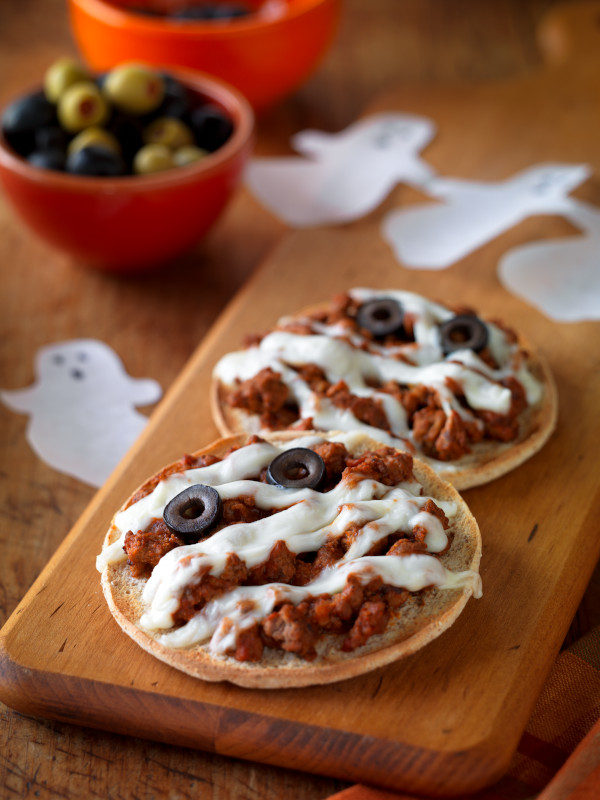
It’s the big night full of fun costumes, trick-or-treating, and, most importantly, some family time. We want everyone to have the best night possible, and one way to help guarantee that happens is by leaving the house with a nice full belly! We’ve put together a recipe collection to help you make a healthy meal and do it quickly so you can get back to painting faces, adding accessories, and making sure everyone has their candy bucket ready to go.
Because just getting out of the house is hard, here is a recipe you can take on the go. Put the ingredients out on the table buffet style, let everyone add what they want and then head out to go collect candy!
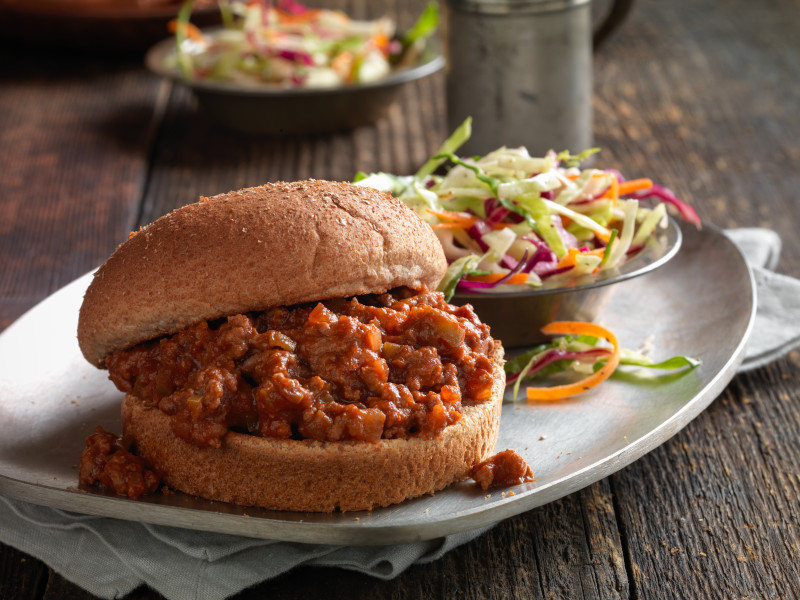
Depending on where you are, Halloween night can be a chilly one. So warm everyone up from the inside before they head out with this delicious and easy beef chili recipe.
This is an idea for the picky eaters and a way to make everyone happy with one meal. Cook up your beef and offer various ideas to your family. Everyone will walk away with a full belly!
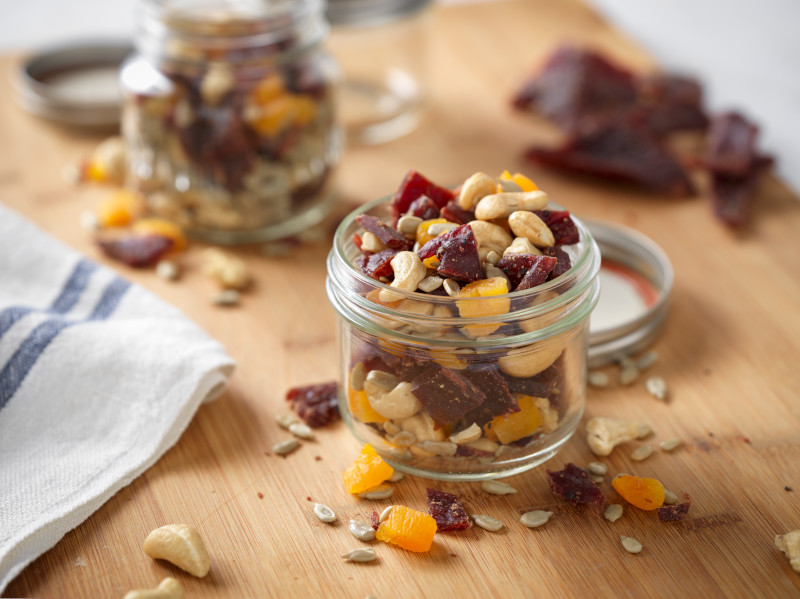
And if getting a meal in before trick-or-treating is just not going to happen, offer this delicious and easy snack full of protein and other nutrients. It’ll keep everyone fueled up for the night and not because of the sugar.
Reposted from the Chiles and Smoke blog found HERE. Brad Prose is a Phoenix-born family man, professional recipe developer, food writer, and culinary photographer – the force behind Chiles and Smoke™. His combined passion for fine dining and BBQ shines through his presentations and cooking style. Brad uses social media, the website, and his brand to share his passion and story to inspire new ideas.
If you smoke it, they will come. Smoked Burgers should be the official smell of the summer. There’s something magical about the way the smoke lightly permeates the rich beef. It’s that added ingredient you never knew you were missing.
Burgers cooked on the grill already induce that Pavlovian response. Burgers enveloped in a mysterious hug of smoke will make you the new king of the hill and backyard hero. This will break down the process of burgers on a pellet grill, gas grill, and charcoal grill.
Whether it’s happened to you, or you’ve witnessed the pyrotechnics of someone else grilling burgers, we’ve all seen them get torched. These easy-to-follow steps will give you juicy burgers packed with flavor every single time. Here are some of the reasons you’re going to convert to smoked burgers:
Smoking burgers keep them juicy while adding another layer of flavor.
This method works on any type of grill or smoker.
Precise timing allows you to plan accordingly.
Customize the flavor profiles with both your choice of wood and toppings.
Less likely to burn as they are cooked indirectly.
This method works for a few burgers or if you decide to smoke burgers for a crowd.
HOW TO MAKE SMOKED BURGERS
Whether you’re looking for how long to smoke burgers or learning how to cook hamburgers in a smoker, let’s bite into the meat of it all. The process to make smoked burgers starts the same regardless of what you are going to smoke your burgers on. This step can be done the night before.
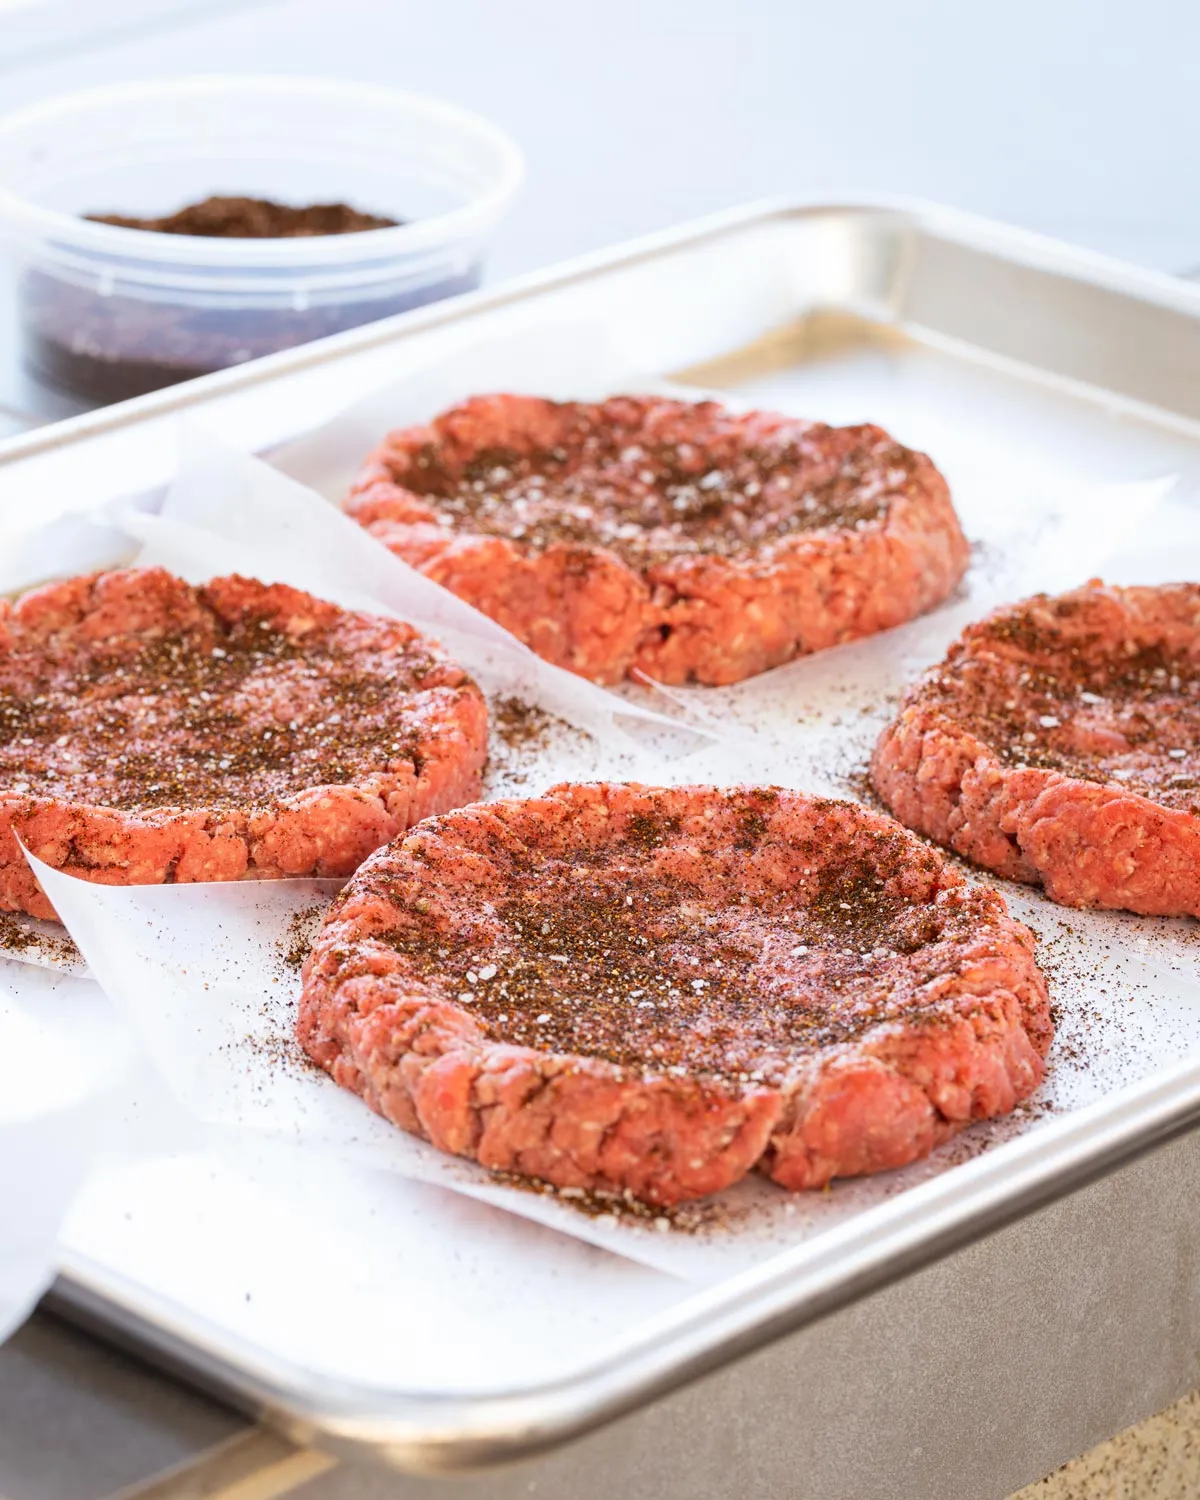
PREPPING THE BEEF FOR SMOKING
Form your ground chuck into four equal-sized patties, careful not to over-press the meat. Use your thumb to lightly press down in the center of each burger patty to create a divot. This will prevent the smoked burgers from swelling in the center during the cooking process.
Chill the beeffirst. Place each individual patty onto a piece of parchment paper on a baking sheet. Allow them to refrigerate for at least an hour up to overnight. Letting them set up will help them keep their shape while also giving them a red smoke ring on the outside that will impress your family and friends.
Form the patties about 1/2-inch wider than the bun. They will shrink on the grill, so make sure you use a bun to measure the size if you need.
SEASONING OPTIONS
Is there anything better than a juicy cheeseburger dripping down your arm as you go in for that cheesy bite? It doesn’t take many ingredients for these smoked hamburgers to have you rolling up your sleeves and going in for the burger hunch. You could go with a typical salt & pepper blend and have success, but if you’re looking for a deeper flavor profile, here’s a suggestion:
Espresso Steak Rub
This rub provides a balance of earthy, bitter, warm, and savory flavors that compliments the ground beef without overpowering it. In addition, it also works well with the flavors of barbecue sauce.
One of the best things about this recipe is that you don’t have to sweat over having the right equipment. Any grill or smoker will work for making smoked burgers, as long as you have the wood chips for it. They are SO affordable and allow you to mix and match.
Using the Pellet Smoker
Make sure your hopper is filled with pellets.
Preheat your grill or smoker to 250-275°F. Make sure your grates are clean.
Place your burgers onto the grates and close the lid.
Using a Charcoal Grill
Prepare your charcoal grill for 2-zone cooking, aiming for about 250-275°F. This means you are going to bank your charcoal to one side of the grill creating a hot zone and cool zone.
Add a handful of wood chips over the top of your charcoal, making sure to evenly distribute them. This will prevent any flare-ups.
Place your burgers on the cooler side, making sure to monitor the ones closest to the coals.
Using a Gas Grill
Create a foil pack. Tear off a piece of foil large enough to accommodate about 1 cup of wood chips that are spread out. Fold all the sides over to create an envelope. Use a fork or knife to carefully pierce 2-3 holes in the top of the foil pack so the smoke can escape. Be careful not to pierce all the way through both sides of the foil, and also don’t create too many holes.
Preheat your grill to 250-275°F. Place the foil pack on top of a burner turned to high heat. Allow the wood chips to smolder as it comes to temperature.
Place the prepared burger patties on the cool side of the grill and close the lid.
ADDING FLAVORS WITH WOOD CHIPS
If you’re using a charcoal grill or a gas grill, wood chips come in handy for an affordable way to add smoke.
Use a stronger wood flavor, such as mesquite, pecan, hickory, or oak. These smoked hamburgers don’t take too long, and beef can really soak it in. My personal favorite is a combination of hickory and mesquite, giving it that nice smokey bacon profile. This is the time to infuse it with flavor!
Check out the video tutorial below for a highlight of the benefits and uses:
Important Tips for Maximum Flavor
Use beef with at least 15% fat. The low and slow process of having your burgers in a smoker can cause the beef to dry out if it’s too lean. I typically recommend either 80/20 or 85/15, whichever you prefer.
Don’t season your burgers ahead of time. Salt can draw out the moisture in a way that will cause the textures and flavors to be off with burgers. Season the hamburger patties right before you place them into the smoker or grill instead.
Monitor the temperature of your smoked hamburgers. An instant-read thermometer is a great way to ensure you reach your desired temperature. If you are looking for a slightly pink color, you’ll want to smoke the burgers until about 135°F before searing (if you choose to), or just cook them until about 160°F temperature and allow the burgers to rest.
Searing your burgers is not necessary. Not only is it an extra step (and potentially much more work depending on your grill) but you run the risk of overcooking. However, if you would like more of a crust on your burgers, begin searing them when you are about 20 degrees from your desired temperature.
Rest is best, even with burgers. Allow the smoked hamburgers to rest for 5-10 minutes, loosely tented with foil. This is a great time to toast your hamburger buns.
IDEAL TOPPINGS FOR YOUR BURGERS
When it comes to building the ultimate smoked hamburger, you always want to think about how flavors and textures play together, as well as temperatures. Because these burgers have a hint of sweetness from barbecue sauce, something acidic is a nice counterpoint.
There should never be too much of any one thing because you want to taste each burger topping while also having them all work together. These are just some suggestions for this smoked burger, but let the burger be your canvas and make it your own.
Gouda cheese: mildly and creamy, it has an ideal melt factor while not overpowering the smoke flavor. Muenster, Havarti, and the classic American cheese are other options.
White onions: The sharp freshness of the onions cuts through the richness of the beef and cheese. They also offer an irresistible crunch.
Pickled jalapenos: The heat and acid balance the sweetness of the barbecue sauce while adding a kick to every bite. The white onion and pickled jalapenos are a traditional pairing with Texas BBQ which compliments the barbecue sauce.
Smoked Dijon mustard: This spicy condiment is worth the effort, which isn’t much work.
Good quality mayonnaise: Spread it, slather it, smear it. Nobody likes dry buns. Mayo is the ideal condiment for this burger. It doesn’t overpower anything while offering up just enough tang to liven everything up.
FREQUENTLY ASKED QUESTIONS
Why should I smoke burgers?
Smoking burgers allows you to infuse your burgers with the additional flavor of smoke while keeping them juicy. Cooking them at a lower temperature keeps them juicy and helps prevent flare-ups.
Do I need to sear my smoked burgers?
No. This process uses a lower temperature to cook the burgers more gently. However, you can sear them if you want the additional texture; you just risk overcooking them.
Do I need to soak my wood chips for smoked burgers?
No! There is no need to soak your wood chips for either use on a charcoal grill or gas grill. Not only does it drop the temperature for charcoal grilling, but it also affects the flavor.
What type of wood should I use for smoked burgers?
Have fun playing around and discover what you like. Any type of oak, mesquite, or hickory is all great options.
Celebrate National Cheeseburger Day on September 18th with a few of these great-tasting recipes created just for you by the culinary team over at Beef. It’s What’s for Dinner. You will find a recipe for everyone in this collection, from the Lean Mean Cheeseburgers to the Classic Cheeseburger recipe. Check all of these out, and have a great National Cheeseburger Day!
Switch up your usual burger toppings with this French bistro-style cheeseburger recipe. Grilled onions and a tasty Dijon-style mustard sauce top these tasty cheeseburgers.
It’s that time of the year: when we patiently wait for the Arizona temps to drop, pumpkin spice is now in every coffee cup, and the Friday night lights kick on along with our favorite teams competing on Sundays. Whether you’re at the stadium tailgating or entertaining at home, nothing brings people together like a little party with a lot of beef. Check out some of our favorite Beef. It’s What’s for Dinner. recipes for tailgating season.
Celebrity chef Hugh Acheson shares one of his favorite snacks, perfect for an at home tailgate, with this “as seen on GoodMorningAmerica.com” recipe that pairs chicken-fried Strip Steak with a hot sauce gravy.